In the last post we learned how to create routes in laravel with route parameters but in that tutorial we did not create any view we only returned plain text.In this post I will show you how to create a view for a particular route using blade template engine.Since Laravel is a framework based on MVC architecture we have to follow certain standard format while developing our Laravel Applications
Before we jump on to code lets understand what is a view?
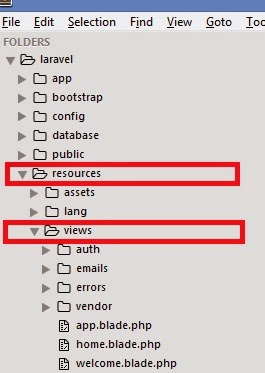
Views typically contain the HTML of your application and provide a convenient way of separating your controller and domain logic from your presentation logic. Views are stored in the resources/views folder
Before we jump on to code lets understand what is a view?
Views typically contain the HTML of your application and provide a convenient way of separating your controller and domain logic from your presentation logic. Views are stored in the resources/views folder
Now lets jump into the code
Open routes.php located in app/Http folder and create a new route.Read more about creating routes.
1 2 3 | Route::get('fruits',function(){ return View::make('fruits'); }); |
Save the file.Create a new file named fruits.blade.php in the views folder and dump in some basic php stuff and save the file.I just did this
1 2 3 4 5 6 7 8 9 10 | <!DOCTYPE html> <html> <head> <title>Fruits page</title> </head> <body> <?php $var = "Fruits view"; ?> {{ $var }} </body> </html> |
Open the browser and navigate to localhost/laravel/public/fruits(According to my file structure yours might vary).You should get the following output.

What we just did is created a route to fruit view.The function in the route called the static make method of the view class and the argument that it takes is a view.Make sure that a view exists before you create a route otherwise you will be presented with a page full of errors.We named the view as fruit.blade.php we used the blade extension to tell the framework that we are using blade templating engine.You might have noticed that {{ $var }} did the job of echo $var.This is where blade template becomes handy,it makes code clean and tidy and removes the need of those untidy <? echo ?> when you want to print something.Blade template is not limited to only printing on page but it has many uses which we will see in the later posts.
No comments:
Post a Comment