Tuesday 31 March 2015

Passing data to views in laravel

In this post I will show you how to pass data to views in laravel.This post is going to be a bridge between the route post and views.We will see how to pass data from routes.php file to views.
To get started lets open up the text editor and open routes.php and fruits.blade.php file( We created this file in the last post)
We will make some modifications in routes.php so that it is able to pass data to views/fruits.blade.php
There are two ways for passing data to views from routes
First one is like this


1
2
3
4
Route::get('fruits',function(){
 $fruitname = "Apple";
 return View::make('fruits')->with('var',$fruitname);
});


here we made use of with method to pass the variable.with() method takes 2 arguments,First one is the string and the second one is the variable.The string defines how you want your variable to be called in the view.In our example we have called it as var.Thus we can access the var value in views
Save the routes.php file.Open the fruits.blade.php and type in the following script
fruits.blade.php


1
2
3
4
5
6
7
8
9
<!DOCTYPE html>
<html>
<head>
 <title>Fruits page</title>
</head>
<body>
{{ $var }} 
</body>
</html>


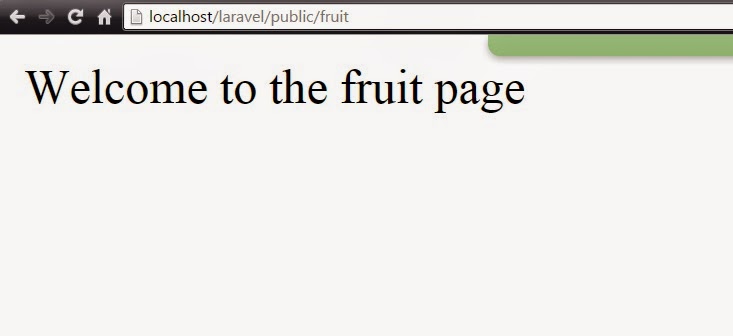
Save the file and open you browser and browse to localhost/laravel/public/fruits you should get the following output.


Second way of passing the data

In this method we can pass the variable as an array without using the with() method.We can pass value as an array using key value pair.


1
2
3
4
Route::get('fruits',function(){
 $fruitname = "Apple";
 return View::make('fruits', array('var' => $fruitname));
});


The fruits.blade.php page remains the same and the out put too.

We can also pass multiple values using array method by adding key value pairs like


1
2
3
4
Route::get('fruits',function(){
 $fruitname = "Apple";
 return View::make('fruits', array('var' => $fruitname,'var2'=>$somevariable,'var3'=>$someothervariable);
});


And access the value of variable in the view using key.
with() method can also be used to send multiple values


1
2
3
4
Route::get('fruits',function(){
 $fruitname = "Apple";
 return View::make('fruits')->with('var',$fruitname)->with('var1',$somevariable)->with('var2',$someothervariable)
});


Accessed in the same way in views.
Next post will be about sending data using magic methods.

Saturday 28 March 2015

Basics of blade and views in laravel (Part-1)

In the last post we learned how to create routes in laravel with route parameters but in that tutorial we did not create any view we only returned plain text.In this post I will show you how to create a view for a particular route using blade template engine.Since Laravel is a framework based on MVC architecture we have to follow certain standard format while developing our Laravel Applications
Before we jump on to code lets understand what is a view?
Views typically contain the HTML of your application and provide a convenient way of separating your controller and domain logic from your presentation logic. Views are stored in the resources/views folder


Now lets jump into the code
Open routes.php located in app/Http folder and create a new route.Read more about creating routes.


1
2
3
Route::get('fruits',function(){
 return View::make('fruits');
});


Save the file.Create a new file named fruits.blade.php in the views folder and dump in some basic php stuff and save the file.I just did this


 1
 2
 3
 4
 5
 6
 7
 8
 9
10
<!DOCTYPE html>
<html>
<head>
 <title>Fruits page</title>
</head>
<body>
 <?php $var = "Fruits view"; ?>
{{ $var }} 
</body>
</html>

Open the browser and navigate to localhost/laravel/public/fruits(According to my file structure yours might vary).You should get the following output.


What we just did is created a route to fruit view.The function in the route called the static make method of the view class and the argument that it takes is a view.Make sure that a view exists before you create a route otherwise you will be presented with a page full of errors.We named the view as fruit.blade.php we used the blade extension to tell the framework that we are using blade templating engine.You might have noticed that {{ $var }} did the job of echo $var.This is where blade template becomes handy,it makes code clean and tidy and removes the need of those untidy <? echo ?> when you want to print something.Blade template is not limited to only printing on page but it has many uses which we will see in the later posts.


Friday 27 March 2015

Routing in laravel with route parameters

This post is about routing in laravel with route parameters in the previous post we saw the basics of routing without route parameters.If you are new to routing in laravel then you should have a look at my previous post about basics of routing in laravel.So let's start
Why to use route parameters?
Many a times a we create a route which are similar,E.g if you have a blogging website your URL will look something like this learn-laravel.blogspot.in/articles/article-name.So if you have 50 articles in your website creating 50 routes in routes.php is not a good idea.If we observe the URL carefully
learn-laravel.blogspot.in/articles/ will remain same for all requested articles only the article name will differ from article to article.So by using route parameters we can group together similar looking paramters.Let's jump into pratical example.
Open routes.php file located in app/Http with your favorite text editor.
You will find some stuff already present in that file,those routes deals with routing the default hopepage of laravel framework.We have nothing to do with those routes since we are creating our new route.
Type the following line in routes.php file


1
2
3
Route::get('articles/{article_name}',function(){
	return 'Inside article_name was requested';
});

save the file open your browser and browse to localhost/laravel/public/articles/hello (According to my file structure).You will get something like this


Here hello becomes the article name.You can try anything e.g localhost/laravel/public/articles/blah-blah.This will still work but if you browse to localhost/laravel/public/articles
you will be presented with a whole page of error.So how to make this route common so that this works both for localhost/laravel/public/articles/hello and localhost/laravel/public/articles without error.
Go back to  routes.php file


1
2
3
4
5
6
oute::get('articles/{article_name?}',function($article_name=null){
	if ($article_name==null) {
		return 'No specific article was requested';
	}
	return $article_name .' article was requested';
});

Open your browser navigate to localhost/laravel/public/articles/hello you will get the article name in the output (hello in this case)


navigate to localhost/laravel/public/articles


So this route work in both the cases.
What we did is we made the {article_name} parameter optional by adding ? ({article_name}?) and passed the parameter in the anonymous function function($article_name=null).Since the parameter is optional it is necessary to assign null value.Then we did a basic check whether $article_name is null or !null and produced the result according.
You can use as many optional parameters in the route but make sure to assign null value.So this was all about routing in laravel with route parameters.


Thursday 26 March 2015

Basics of routing in laravel


This tutorial is about the basic routing in laravel.Before we move on to routing code let's first understand what is router and routing in laravel web application?
Router is a  component of a web application which is responsible for producing correct response for a particular requested URL.Routing is the process of taking the requested URL and deciding which application handler will handle the current request.
So whenever to type a URL in the browser the  Routers setup at the servers examine the URL and decide how to handle it.
In similar manner laravel framework too has routing mechanism setup inside the framework.The file which handles all the routes requested is called routes.php which is located in app/Http folder and open the routes.php file.


As you see there are various routes defined in this file.Routes are defined for base url(/) and home
Go to browser and type localhost/laravel/public (According to my file structure).You will se something like this


If you type localhost/laravel/public/home (According to my file structure).You will se something like this


Route::get('/', 'WelcomeController@index');

Route::get('home', 'HomeController@index');

These two lines are responsible for displaying correct pages when base URL and home is requested.
What does these lines means?
This means we are calling the static get method of Route class this get method takes two arguments.The first argument is requested route and second parameter is the handler.You can see the 'WelcomeController@index'  and 'HomeControlller@index' in the app/Controllers folder


How to create our own route in laravel?
Lets create a route for fruit page
Open routes.php and add the following lines 


1
2
3
Route::get('fruit',function(){
	return 'Welcome to the fruit page';
});

Save the file and navigate to  localhost/laravel/public/fruit (According to my file structure).You will see something like this

What this does is whenever fruit page is requested the anonymous function is called which returns plain text in this example.We will keep this simple in this post.We will deal with creating and routing to particular controller in later posts,So keep following.
Similarly you can create a route for something like fruit/apple


1
2
3
Route::get('fruit/apple',function(){
	return ' Welcome to fruit/apple page';
});


Save the file and navigate to  localhost/laravel/public/fruit/apple (According to my file structure).You will see something like this


If you try to route any page that has not been declared in the routes.php file you will get an error.
Creating routes for each page is not handy in the coming post we will deal with how to create routes that can handle multiple requests based on parameters.

Tuesday 24 March 2015

How to install laravel framework

This post is about installing Laravel framework on your computer provided that you have local server up and running.If you don't know how to install a local server on to your computer you can read my previous post on How to install a local server on computer.
So lets get started.
Open your favorite browser an search for Composer.

But before we download composer we need to allow open SSL.To do this go to your

wamp-folder/bin/php/php5.5.12(number depends on your version)/php.ini 

Open the php.ini file with notepad and search for openssl and make sure that the line

extension=php_openssl.dll

is uncommented

Go back to composer page in browser and hit the download buton


Copy the second link from the download page


Open Command prompt and browse to your Wamp folder and paste the link copied in the previous step

Now type

php composer.phar create-project laravel/laravel www --prefer-dist 

into the CMD and hit enter this will install laravel framework into www folder.

Now we are done with the installation but before we start using the framework we need to set certain permissions to the framework.Go to 

Wamp-folder/www/

Right click on app folder and open properties
Click on the security Tab
Select system and make sure that it has write permission

Now go to 
Wamp-folder/bin/apache/apache2.4.9/conf/

Open the httpd.conf file with notepad and serach for mod_rewrite and remove the # which is in front of the line


Finally we come to the end of this long process.The only thing left now is to check if all the installation was successful
Open up the browser type in localhost you should get a list of folder.
Click on public folder you should get a page like this


Thats all you have successfully installed Laravel framework on your local server 


Monday 23 March 2015

Installing a Local Server

In this post I will show you how to install local server on your computer.Installing a local server depends on what operating system you are using.Windows users should install WAMP,LINUX users LAMP and MAC users MAMP
The Installation process is pretty simple
Download WAMP/LAMP/MAMP.(Windows users make sure you have Visual Studio installed).

Windows users follow these steps:-
Click on the downloaded file


Open your favorite browser and type localhost as the url.You should get the following page which ensures your installation was successful 


For Linux users:-


There are only three major steps to take care of in order to get your LAMP server up and running.

Apache

From within your terminal window issue the command:

sudo apt-get install apache2


If, by chance, you are using a distribution that does not use Sudo, you will need su to the root user and issue the above command without the sudo command.

Depending on your OS installation, the above command might need to pick up some dependencies. If so, okay those dependencies. At the end of the installation, Apache should automatically start. If it doesn't, issue the following command:

sudo /etc/init.d/apache2 start

You can now open up a browser and point it to the IP address (or domain) of the server to get the famous "It works!" page. You are ready to move on to PHP.

PHP

For the purposes of this article, we will assume the "P" stands for "PHP." To begin the process of installing PHP, issue the following command:


sudo apt-get install php5 libapache2-mod-php5

NOTE: Again, depending upon your OS installation, this might require some dependencies to be met. Allow apt-get to pick up those dependencies.

When the installation is complete, restart Apache with the command:

sudo /etc/init.d/apache2 restart

Now, let's give PHP a little test to make sure it has installed. In your terminal window, create a new file called test.php.

Save that file and place it in /var/www/. Now, open up your browser to the address http://ADDRESS_OF_SERVER/test.php. Where ADDRESS_OF_SERVER is the actual address of your server. You should see "Test PHP Page" in the browser. You are now ready to move on to MySQL.

MySQL

MySQL is the database piece of the puzzle. This installation requires a few more steps than what you've just experienced. The first step is to install the server itself with the command:

sudo apt-get install mysql-server

Again, depending upon your OS installation, there might be some dependencies to be installed. After the installation is complete you need to log into the MySQL prompt and give the administrative user a password. Do this by following these steps:
Log into MySQL with the command mysql -u root -p.
As no password has been configured, you will only need to hit enter when prompted for the password.
Enter the command SET PASSWORD FOR 'root'@'localhost' = PASSWORD ('YOURPASSWORD');Where YOURPASSWORD is the password you want to use for the administrative user.
Now quit the MySQL prompt by issuing the command quit and hitting enter.
Start the MySQL server with the command sudo /etc/init.d/mysql start.

That's it. Your LAMP server is now up and running. But what about this one-command method? Simple. From your terminal window, issue the command:

sudo tasksel


This command will open a curses-based tool (see Figure 1) which allows you to select numerous software options for installation. One of those selections is a LAMP server. All you need to do is mark LAMP server for installation (scroll down with your arrow keys and then hit the space bar to select). Once you have selected LAMP server, hit the Tab key on the "button" and hit the Enter key.


Figure 1

You will have to answer a single question when you get to the MySQL portion of the install (what you want to use for the admin password). That's it.


Introduction to Laravel

What is Laravel and why should I learn Laravel?
Laravel is a framework for PHP programming language.
Think of a framework as a ordered structure within a programming language giving you the standard solutions to a typical problems.Using a framework reduces the burden of doing same thing again and again and stops you from re-inventing the wheel again and again.
Laravel framework makes easy handling of frequently used processes such as:-
  • User Registration
  • Authentication
  • Session Handling
  • Database Migration
  • Form Validation etc
Coming back to framework there are a lot of PHP framework that already exists and neither a single of them is bad,but it depends on your utility.Few frameworks are
  • CakePHP
  • CodeIgnitor
  • ZendFramework etc
The best way to know which one is better for a particular type of application is by learning all of them.So that strength and weakness of each framework is discovered.

Why Laravel?
  • Easy to learn
  • Excellent Documentation
  • Active community and forum support
But I will definitely suggest you to learn all the framework and work like a PRO :) 

What do you need to start learning Laravel?
Basic understanding of PHP language.